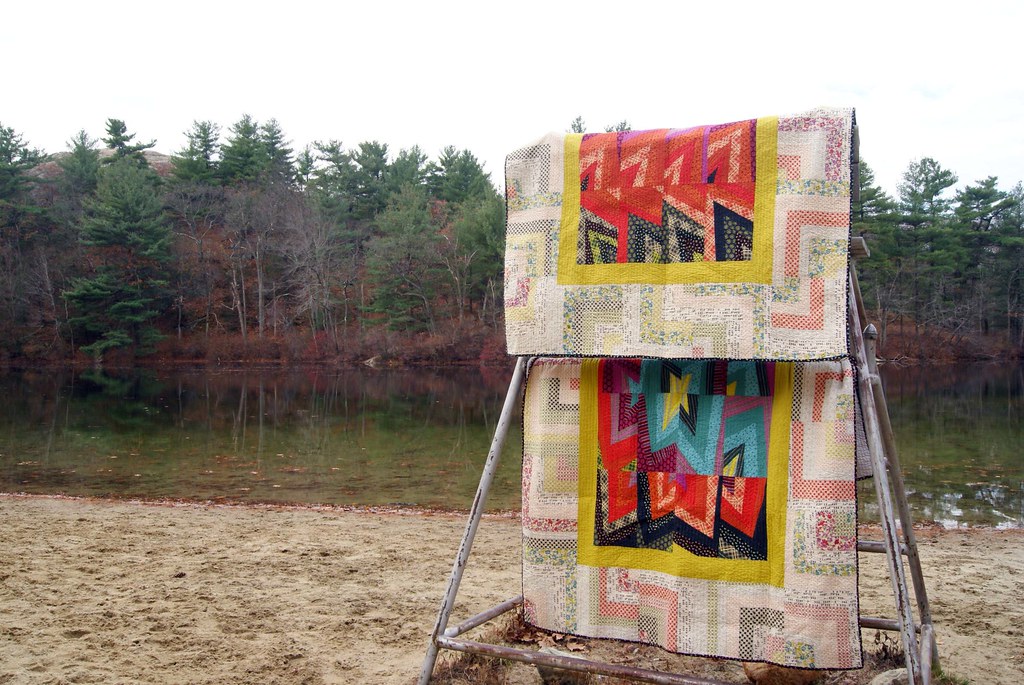
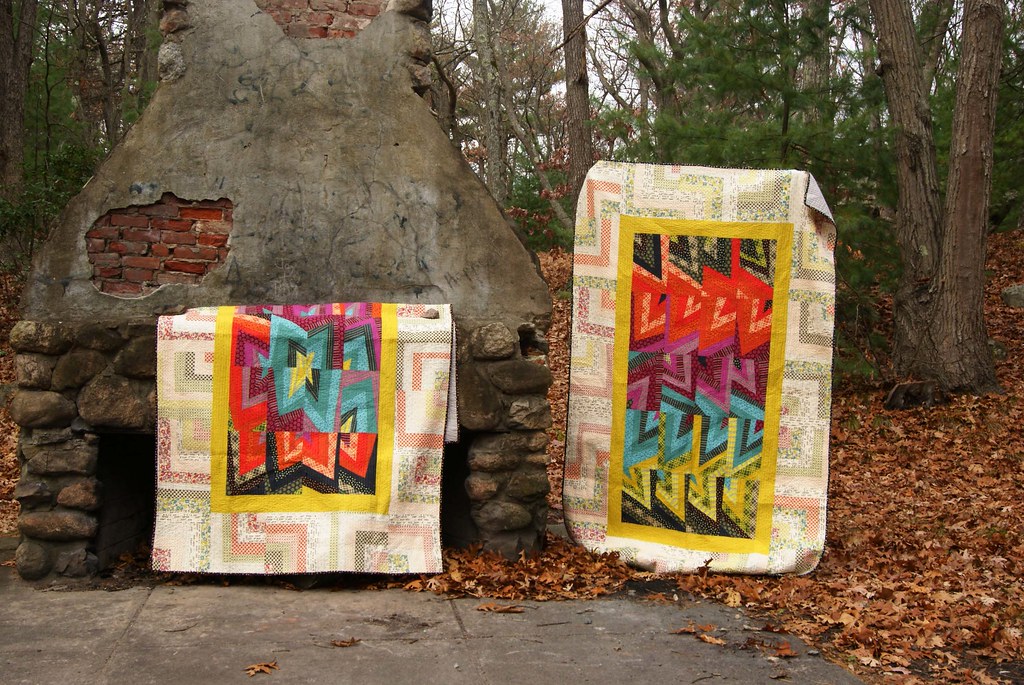
Here, as promised, is your non-tutorial on how I did the center blocks in my Phoenix Twin quilt (there is a photo at the end of this post).
I’m fairly sure I’ve seen these blocks around the internet so I don’t think I’m doing anything particularly original here. But I don’t know exactly where to send you to show you how to do them, so find out here!
(Sidenote: RESPECT to you guys who write tutorials all the time. Just the photos and then the subsequent light photo editing about did me in.)
OK. Here’s the block you’re aiming at:

Take a minute and look. It’s got a little “center” bit on the right hand side; then there are wonky chevrons growing up, and then just wonky strips at the top. You can do this!
Step 1: cut your paper to size. I made my blocks 8.5” x 13.5” unfinished (they finish to 8” x 13”) so I trimmed down legal size paper (8.5” x 14”). You can make these blocks whatever size you want! I’ve made these three blocks the same way, and they are all different sizes. Just remember to add .5” to your desired finished block size, and trim away. (A note: I happen to think these are cooler as elongated rectangles. But they’re also pretty cool as squares.)

(I used a dull rotary cutter blade to cut off my .5” strip! Awesome!)
Step 2: Draw chevrons. With a ruler and a pencil, draw chevrons rising from one corner of your paper. Remember that your “corner” is going to end up on the opposite side of your drawing; so, if you’re drawing a corner on the right-hand side of your paper, the corner will be in the left-hand side of your block. Because you piece on the other side of the paper.

Steps 3 and 4: Extend the “top” horizontal-ish lines on the left to touch the vertical lines (see photo below). Number your pieces for paper-piecing. After you do one of these blocks you won’t need to number anymore. I remind myself that short goes first. (So that you can extend the seam line when you sew on the left, long piece and anchor the top of your short piece to the paper.)

Step 5: Cut your fabric. Remember to oversize the fabric you think you need by at least .75” – 1”. I drew my chevron strips to be about 1.5”-2.75” wide. So I cut strips of fabric that were 2.5”-3.5” wide. (Most, I found, I cut 2.75” wide.) For this block don’t bother trying to cut length. Just cut a strip from your FQ or half-yard or whatever. You can trim off the excess strip length after you’ve pieced on your strip and then use it to piece the second half of the chevron.
I found that my little “center” bits often needed to be 3.5” wide. The little centers are also great for using up little scrap ends!

Step 6: Paper-piece. Go! I’m no paper-piecing expert. My tips begin and end at: use a tiny dab of glue stick to hold down your #1 piece aaaand that’s pretty much it. If you don’t “do” paper-piecing yet, check out Faith at Fresh Lemons’s post about the method (this is the post I learned from, ya’ll). Recently, Michelle wrote up a great handful of tips about the things she’s learned while paper-piecing, and it’s worth a look as well!

For this particular block, the trick is to make sure that the top of the fabric you’re sewing on extends above the point of the chevron segment by at least 1/4”. See above? My Duet Dot strip is lined up so that it will flip over to cover the top point of the #2 segment by about 1/4”.
(The beauty of the improv method is that if you screw this up and your fabric is short in any way, look what you can do:

you can redraw your paper-piecing lines to fit your fabric. Yay for less seam-ripping.)
Step 7: Trim. Flip your paper back from your seam and trim off excess fabric (use your ruler to create a 1/4” seam allowance), then press the new seam with a dry iron and use the paper as a guide to trim off the excess fabric outside the rectangle.
Step 8: Repeat as needed until your chevrons are all pieced.
and voila
block.
Basically, if you’ve paper-pieced before, all you need to know is that you can draw the lines with a ruler and a pencil. (I have to thank Charlotte at Displacement Activity for showing us all we can do this; I have probably also seen other people mark paper-pieced patterns with pencil.) With really careful color planning, you can do really fabulous things with layout.
Let me know if you try it! And let me know if I can help or clarify anything.